|
|
|
|
This help page will address a number of topics having to do with importing time data from Sympaq into Unanet.
Topics covered on this help page include:
You are importing data from Sympaq v3.0 or higher.
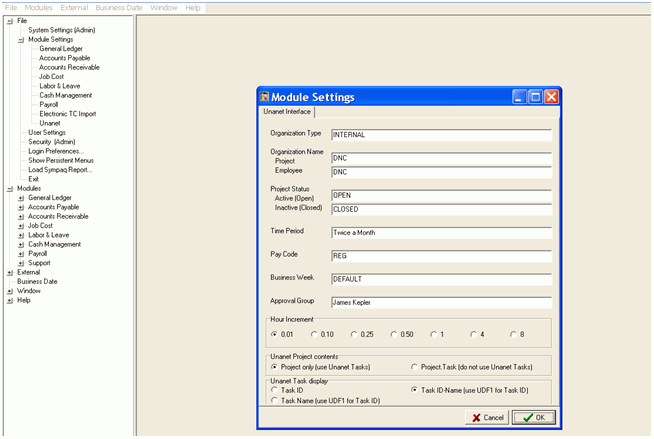
Log into Sympaq and click on: File > Module Settings > Unanet
Load the default Unanet module settings (all of the following fields are required):
Organization Type
Project Organization
Employee (Person) Organization
Time Period
Pay Code
Business Week
Approval Group
Hour Increment - The minimum amount of time a person may charge to a project.
Unanet Project contents
- If the Unanet Project will have Tasks, select ’Project only (use Unanet Tasks)’.
- If the Unanet Project will not have Tasks (this would be in the event the Unanet Project Code is a concatenation of the Sympaq Project and Task (example: 3450-001)), then select ’Project Task (do not use Unanet Tasks)’.
Unanet Task display
- If the Unanet Task Name will be populated with the Sympaq Task ID (example: 001) then select ’Task ID’.
- If the Unanet Task Name will be populated with the Sympaq Task Name (example: Requirements Gathering) then select ’Task Name (use UDF1 for Task ID)’.
Note: The Sympaq Task ID is stored in the Unanet Task User Defined Field #1
- If the Unanet Task Name will be populated with the Sympaq Task ID and Task Name (example: 001-Requirements Gathering) then select ’Task ID-Name (use UDF1 for Task ID)’.
Note: The Sympaq Task ID is stored in the Unanet Task User Defined Field #1
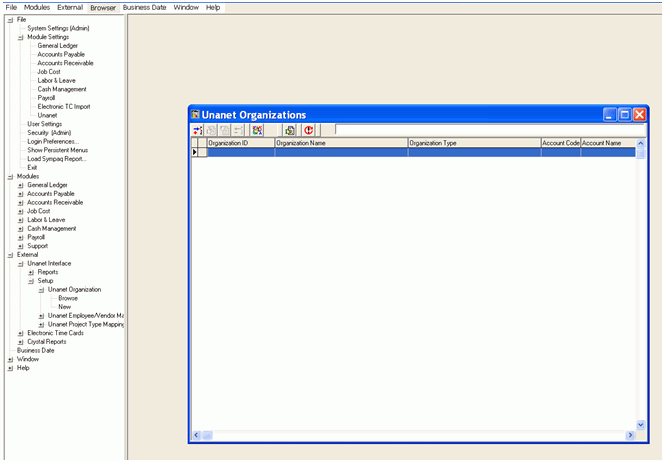
Click on: External > Unanet Interface > Setup > Unanet Organization > Browse > (to add a new Organization)
Load all of the Unanet Person and Project Organizations by completing the following required fields:
Organization ID – This is the Unanet Person or Project Organization Code
Organization Name – This is the Unanet Person or Project Organization Name
Organization Type – This is the Organization Type associated with the Unanet Organization
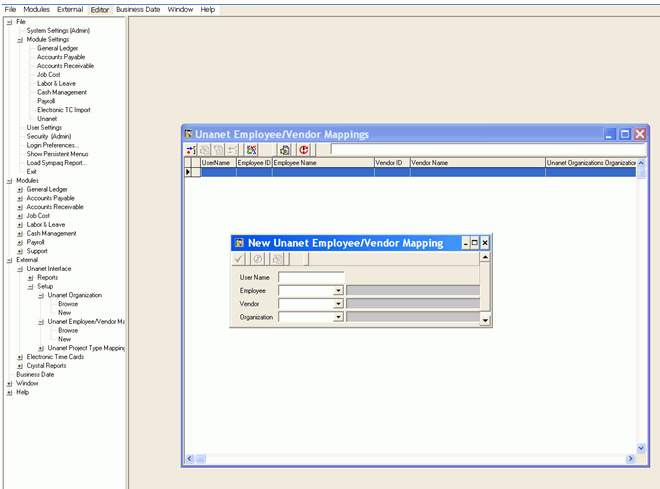
Click on: External > Unanet Interface > Setup > Unanet Employee/Vendor Mappings > (to add a new Employee or Vendor)
Load all of the Unanet Employees (Users) and Vendors by completing the following required fields:
User Name – This is the Unanet Username (Login ID)
Employee – Select the employee from the dropdown list (if you are mapping an employee)
Vendor – Select the vendor from the dropdown list (if you are mapping a vendor)
Organization – Select the Unanet Person Organization to which the Employee or Vendor will belong
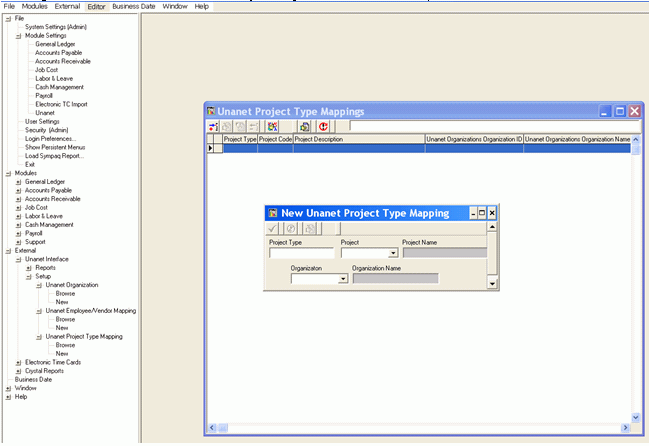
Click on: External > Unanet Interface > Setup > Unanet Project Type Mappings > (to add a new Employee or Vendor)
Load all of the Unanet Projects by completing the following required fields:
Project Type – Enter a Unanet Project Type (ex. ’BILLABLE’, ’NON_BILL’, ’ADMIN’)
Project – Select the project from the dropdown list
Organization – Select the Unanet Project Organization from the dropdown list
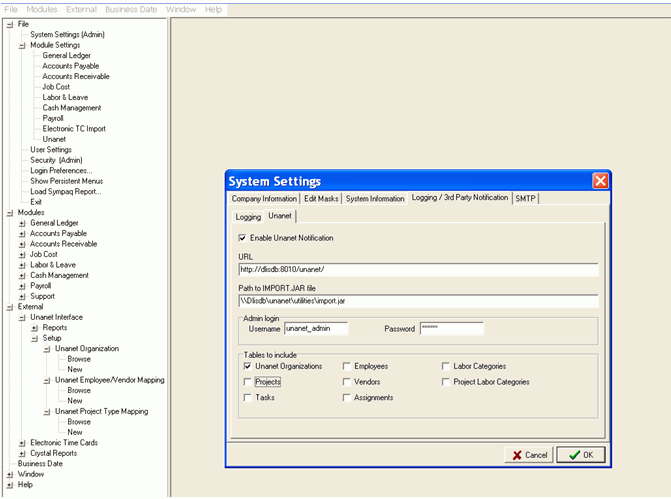
Click on: File > System Settings (Admin) > Logging / 3rd Party Notification (Tab)
Load all of the Unanet System Settings by completing the following required fields:
Check the box labeled: ’Enable Unanet Notification’
URL – Enter the Unanet URL
Path to IMPORT.JAR file – Enter the directory where the Unanet IMPORT.JAR file is located
Note: The IMPORT.JAR file is typically located in the Unanet/Config directory
Admin Login – Enter the Username and Password of a Unanet account that has the ’Administrator’ role
Note: It is a best practice to create a generic Unanet Admin account as opposed to using the account of an actual user as a user may leave your organization and that account would be disabled
Tables to include – Check the boxes of all data that will be sent from Sympaq to Unanet
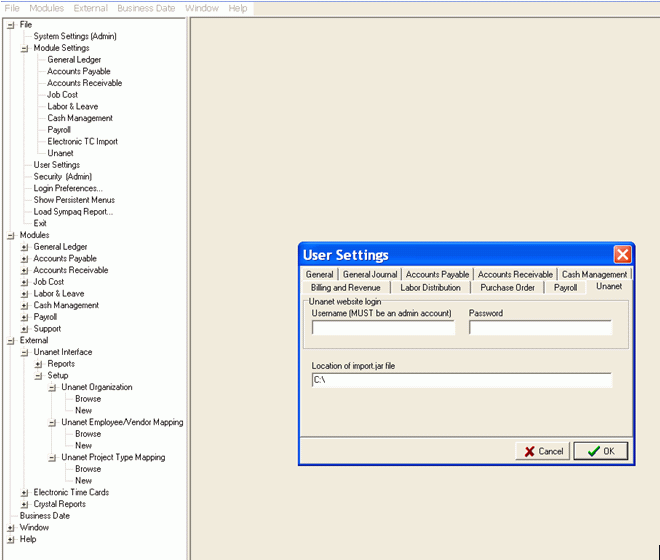
Click on: File > User Settings > Unanet (Tab)
Load all of the Unanet User Settings by completing the following required fields:
Username (MUST be an admin account) & Password – Enter the Username and Password of a Unanet account that has the ’Administrator’ role
Note: It is a best practice to create a generic Unanet Admin account as opposed to using the account of an actual user as a user may leave your organization and that account would be disabled
Location of import.jar file - Enter the directory where the Unanet IMPORT.JAR file is located
Note: The IMPORT.JAR file is typically located in the Unanet/Config directory
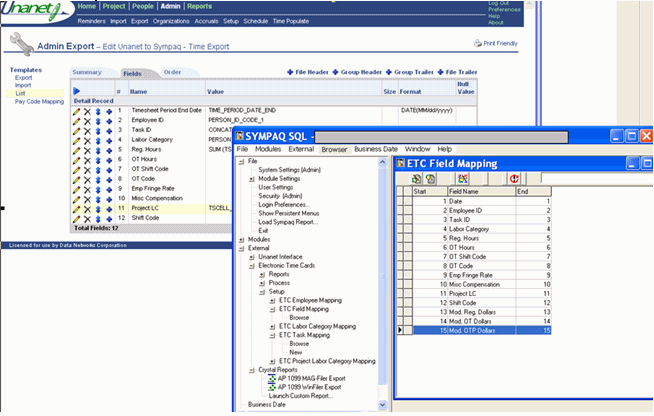
Click on: External > Electronic Time Cards > Setup > ETC Field Mapping
The Sympaq ETC Field Mapping should match the Unanet to Sympaq - Time Export Fields
Example: Sympaq ETC Field Mapping #3 – ’Task ID’ matches the Unanet to Sympaq - Time Export Field #3 – Task ID
Note: Unanet and Sympaq are flexible and the fields in both systems may be organized in the order of your choice
